1. Launch the Editor
cd tools/trajectory_editor
python3 app.py
Then open http://localhost:5000/ in your browser.
If you’re running on a remote server, replace localhost with your server’s IP address.
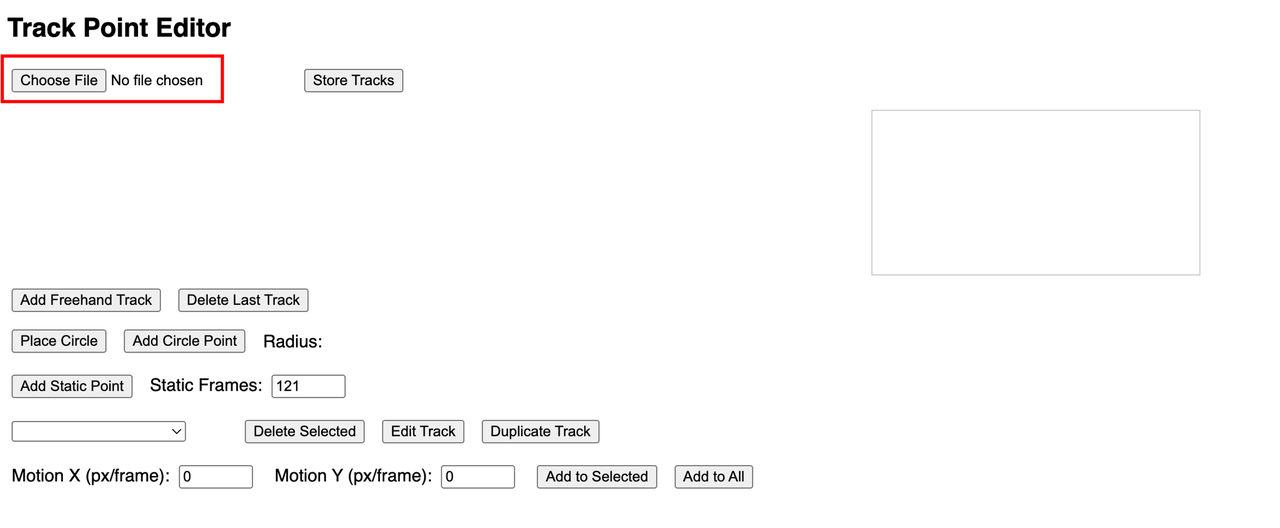
2. Load an Image
Click the Choose File button to open a local image:
3. Available Trajectory Functions
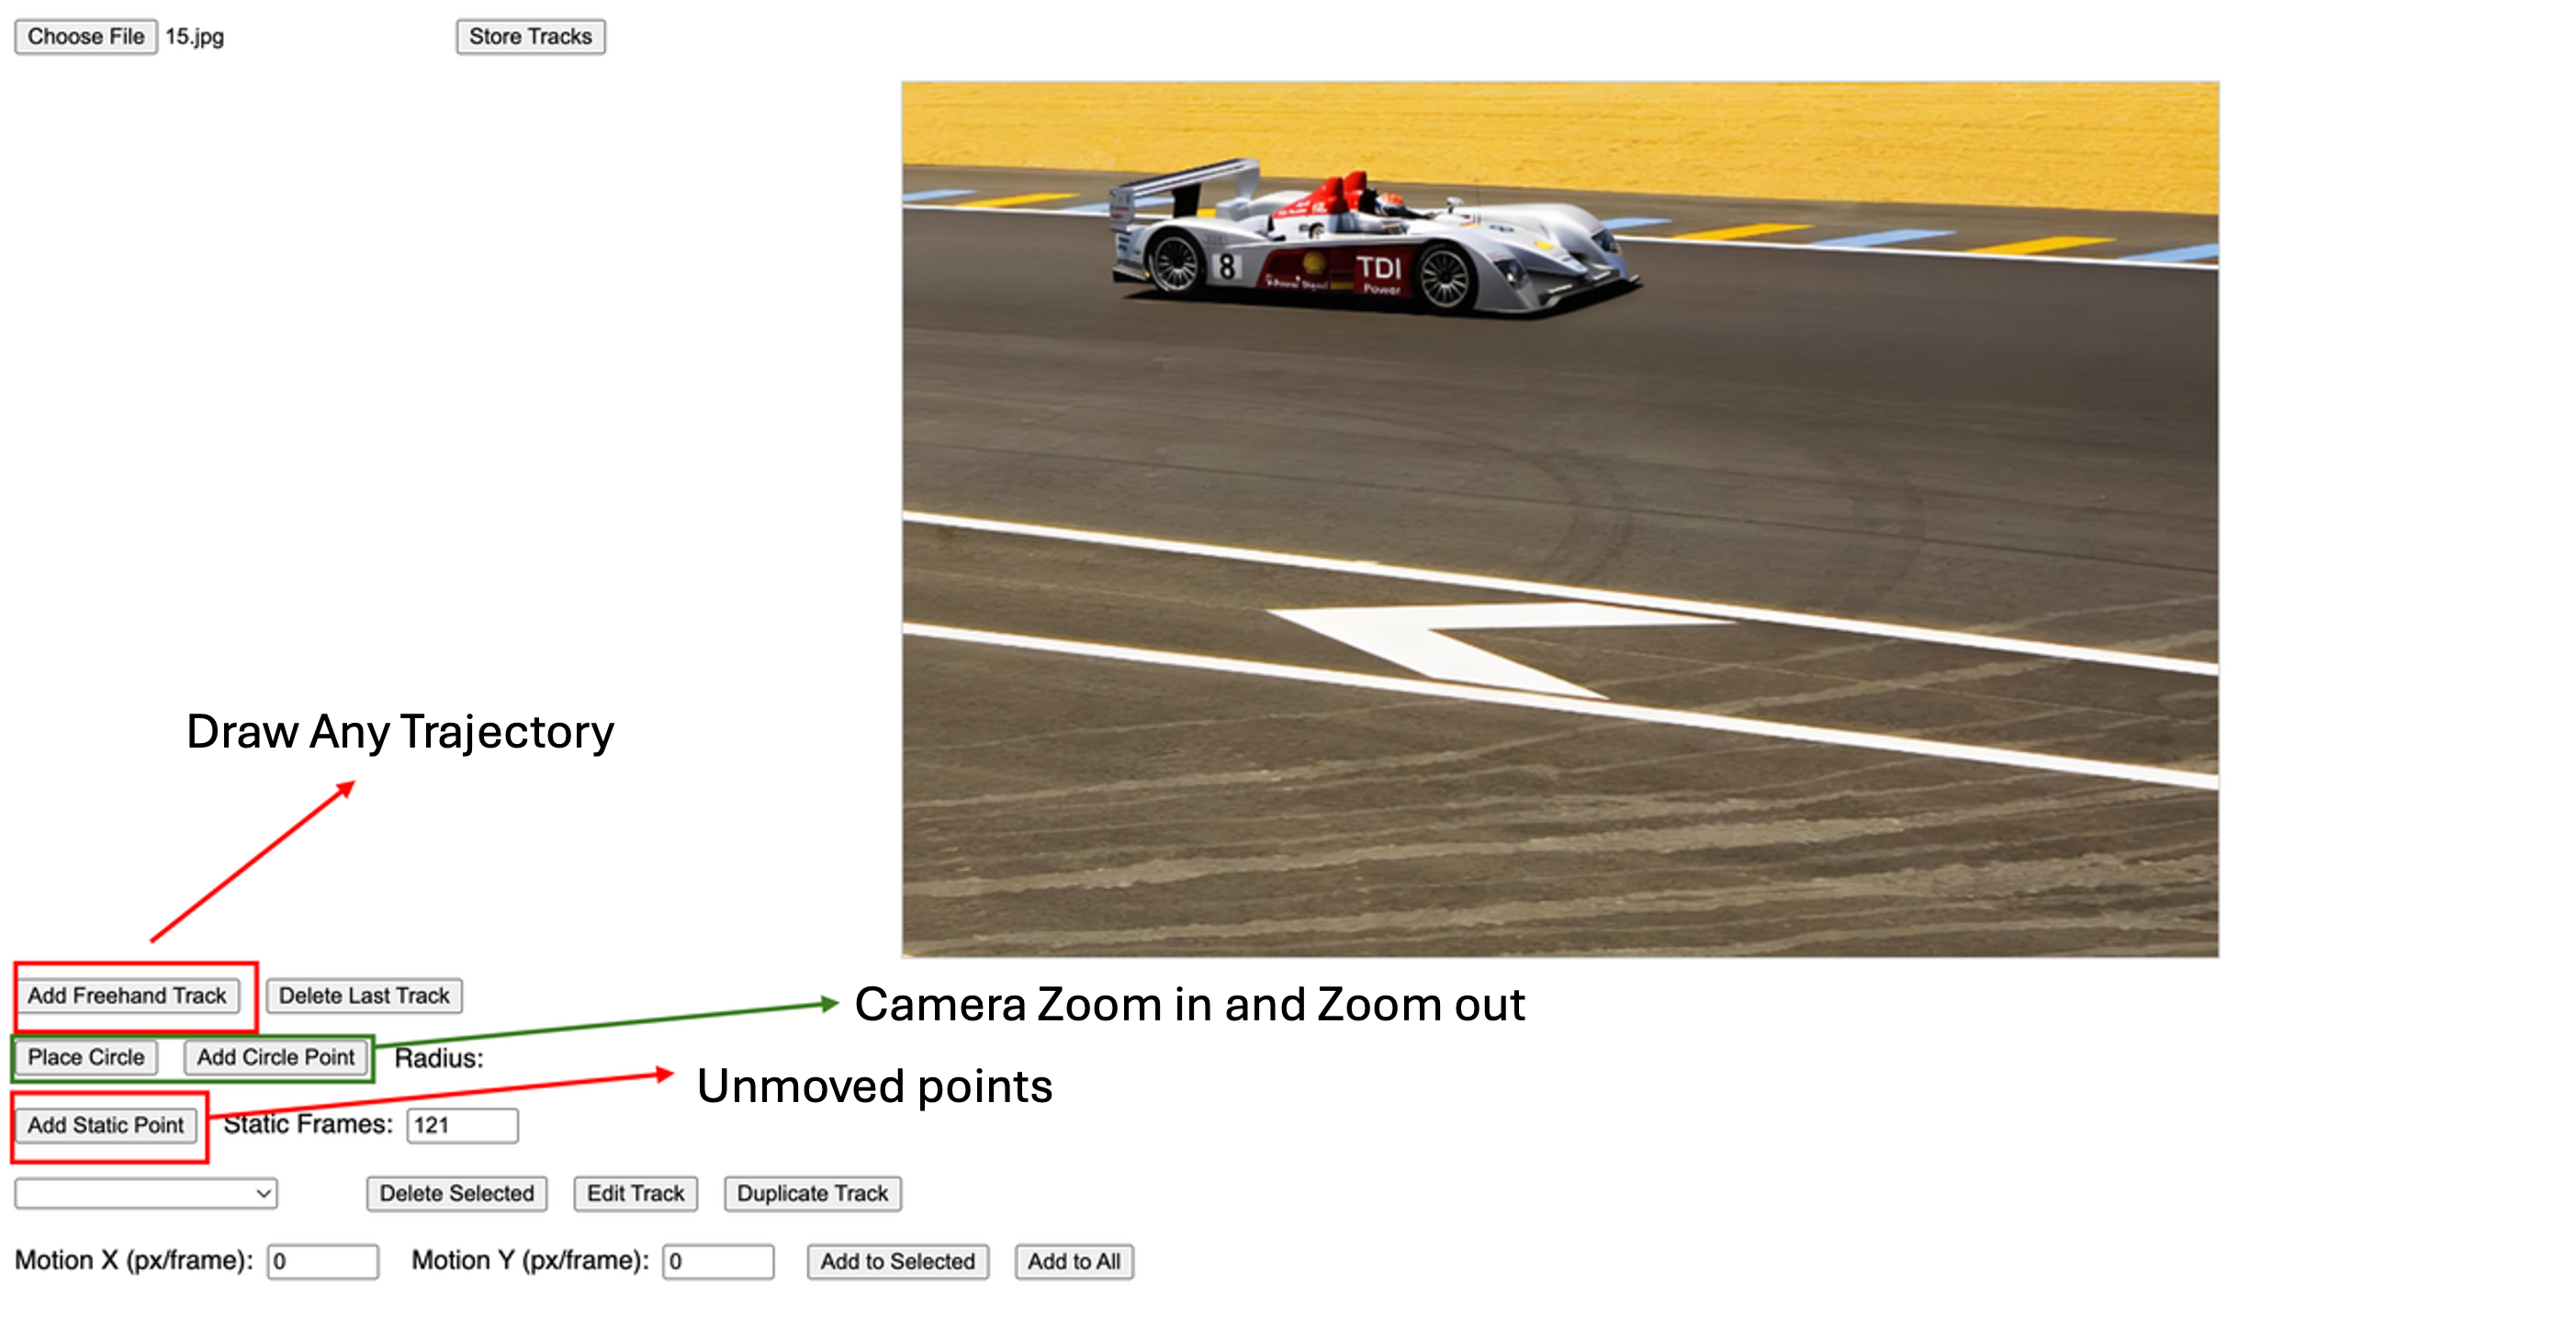
- Free Trajectory: Click and drag directly on the image.
- Circular (Camera Control):
- Place a circle to set its size for frame 0.
- Place 3–4 track points on the circle.
- Drag the radius control to zoom in/out.
- Static Point: A point that remains stationary over time.
Note: Use the progress bar below to control motion speed:
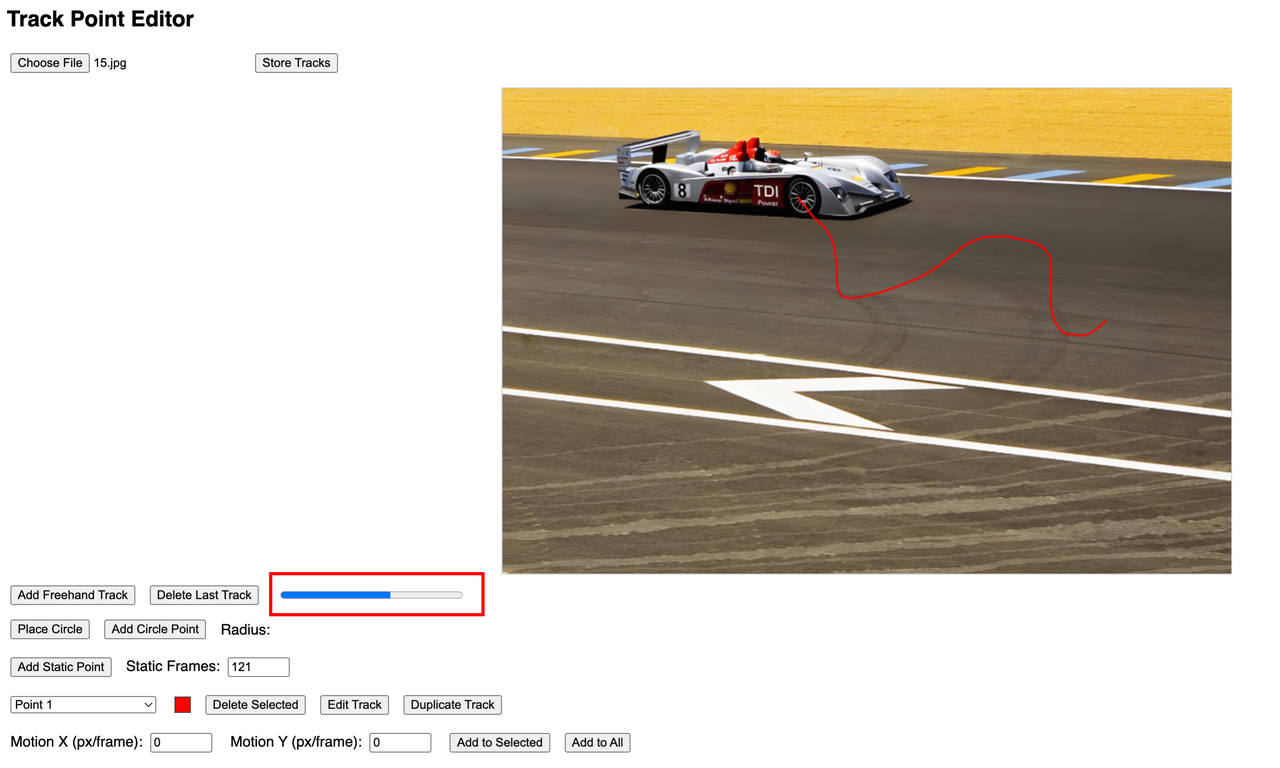
4. Edit Trajectories
Select a trajectory in the sidebar to delete, edit, or copy it. In edit mode, drag points right on the image. The active trajectory is highlighted in color.

5. Camera Pan Control
Enter horizontal (X) and vertical (Y) speed (pixels/frame):
- Positive X → move right; negative X → move left
- Positive Y → move down; negative Y → move up
Click Add to Selected to apply to the current trajectory, or Add to All to apply to everything.

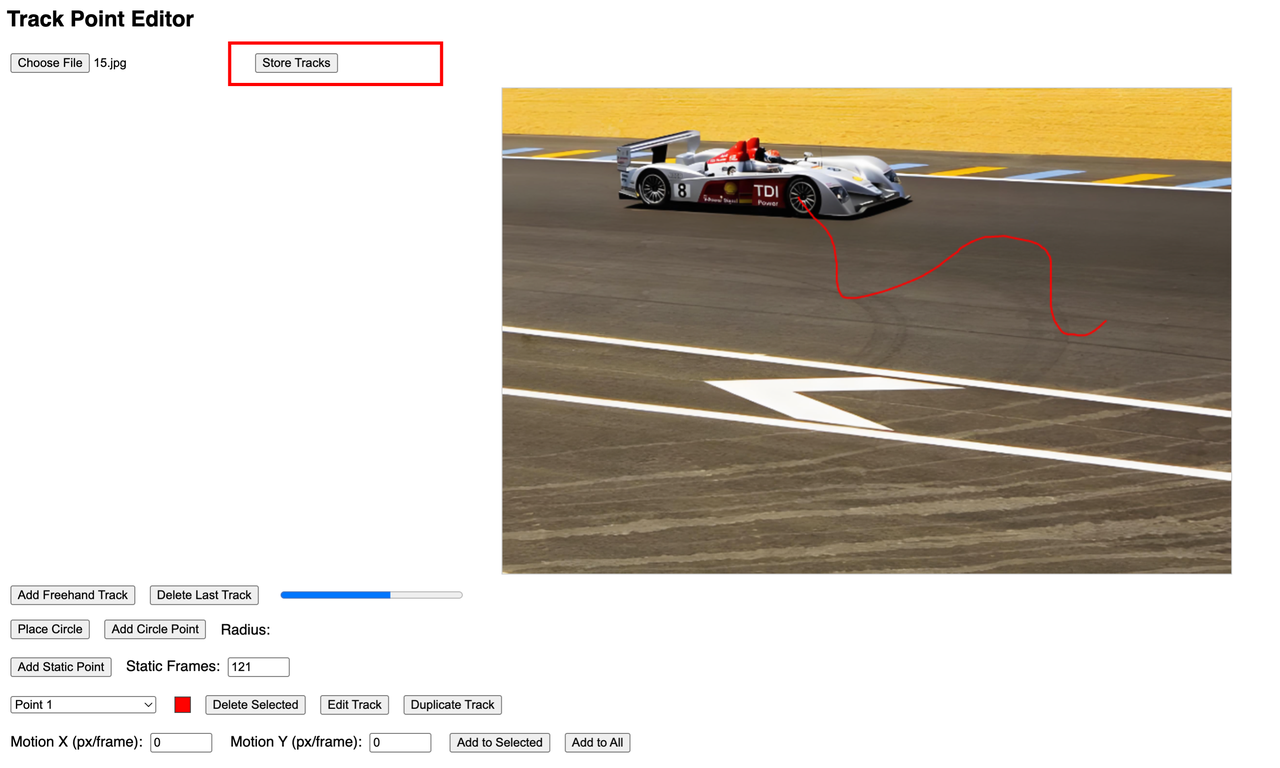
6. Store Your Tracks
Once you’re happy with your edits, click Store Tracks to save. Important: Each image’s set of trajectories must be saved separately.
7. Locate Your Saved Tracks
After storing, find your track files in the videos_example folder under tools/trajectory_editor.